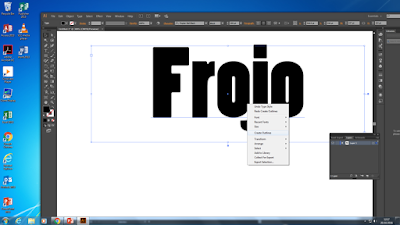
Today, we learnt how to create a masthead using illustrator. Firstly, we wrote either the name of our magazines or anything we could think of if we had not already had a masthead name. this was then manipulated using a two techniques.
TECHNIQUE 1
- Using the black mose we created an outline by pressing right click then selecting "create outline".
- Once that was done, we zoomed in and checked on the corners of the letters where it showed "anchor" in red.
- Checking on the anchors we moved the corners of the letters to form a new shape for the letter.

TECHNIQUES 2
- Using the masthead name again, we then replicated the name by checked on it holding "Alt" and dragged it down.
- With the replicated version we placed it on a textured image of our choice.
- Then going on "object" we clicked compound path and then make. this made the outline of the the texture only visible
- First select the image and text
- Then again clicking on "object" we used clipping mask and selected make. This changed the texture of the masthead.

No comments:
Post a Comment